


Key Highlights
- This blog post provides a comprehensive guide to crafting your own DIY embroidery patterns, empowering you to create personalized designs.
- You’ll learn about the essential tools and materials needed, as well as step-by-step instructions for each stage of the process.
- We’ll explore various methods for transferring your pattern onto fabric, ensuring a smooth and accurate embroidery experience.
- Additionally, discover valuable tips for enhancing your embroidery skills, including mastering basic stitches and experimenting with colors and textures.
- Unleash your creativity and embark on a fulfilling journey of bringing your unique embroidery visions to life.
Introduction
Are you bored with the same old embroidery patterns? How about making your own? This guide will help you turn your creative ideas into beautiful hand embroidery projects. We will walk you through the basics of DIY embroidery patterns and show you important techniques. You will learn to design your own patterns. Then, you can bring your artistic ideas to life, stitch by stitch, using just a few basic embroidery stitches. Let’s start this fun journey of self-expression through the art of embroidery!
Understanding the Basics of DIY Embroidery Patterns
Before we start making our own patterns, we need to understand some basics. Hand embroidery is the skill of decorating fabric with a needle and thread. It uses different embroidery stitches to form designs, patterns, and textures. Each stitch has a special appeal and use. When you learn them well, you can explore many creative ideas.
An embroidery hoop is an important tool for this craft. It keeps your fabric tight, stopping it from wrinkling. This helps to make your stitches nice and even. As we move into making DIY patterns, we will look at these details closely. You will get clear steps and useful tips along the way.
The Appeal of Custom Embroidery
One great thing about hand embroidery is making your own embroidery pattern. When you create your own design, you add a piece of yourself, your interests, and your style to each work. This personal touch makes your pieces more than just stitching; they become unique expressions of your art.
Another benefit of creating custom embroidery is the choice of colors and textures. You have many options of embroidery floss colors to pick from. You can try different shades and blends to get the look and feel you want for your project.
Whether you like bright and bold colors or soft and gentle tones, follow your creative instincts. Enjoy the process of customizing your embroidery from the first idea to the last thread. Watch your creations come to life with amazing color and originality.
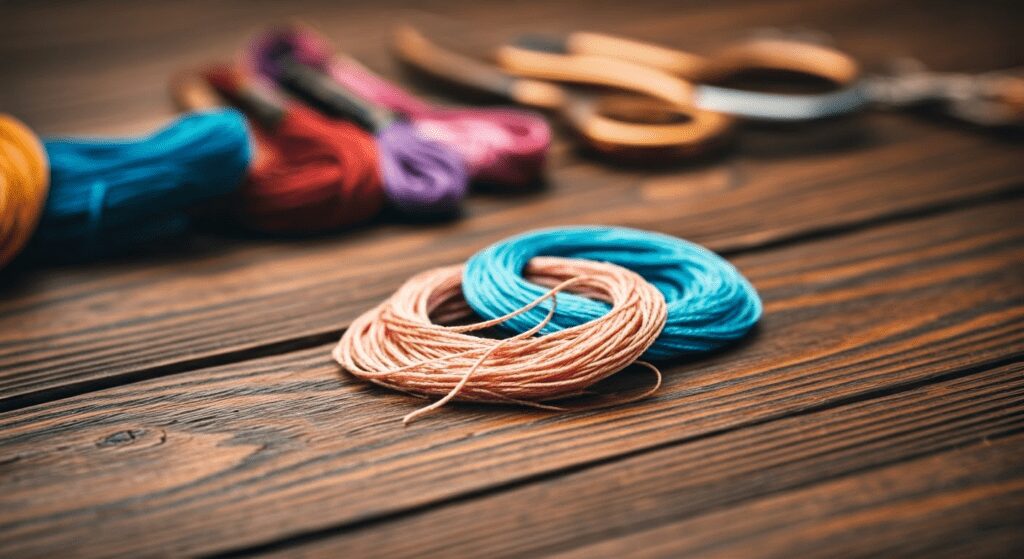
Essential Tools and Materials for Starting
Before we start with the fun part, let’s gather the tools and materials we need. Having the right equipment will make your embroidery experience better. Here is a list of what you should have:
- Embroidery hoop: This important tool keeps your fabric tight. It helps stop wrinkles and helps you stitch evenly.
- Embroidery needles: Choose needles that are made for embroidery. They come in different sizes for different types of thread and fabric.
- Embroidery floss: This six-strand cotton thread is great for hand embroidery. It has many colors and a nice shine.
Along with these basic items, you will also need fabric scissors, water-soluble marking pens, and good lighting. Make sure to pick comfortable scissors for cutting threads and fabric accurately.
Preparing to Create Your Embroidery Design
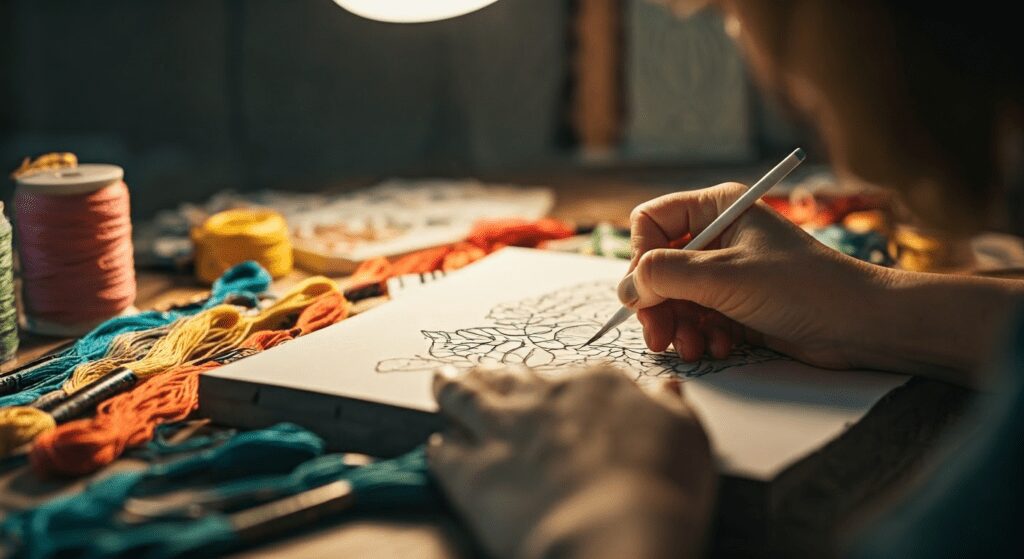
Now that we have our tools and materials ready, it’s time to make your own embroidery pattern! First, decide on your design. You can create something unique or use existing artwork as a base. Turning your chosen design into an embroidery pattern is very important.
To make patterns that are clear and easy to adjust, it’s best to change them into line drawings. This makes the design simpler and easier to put on fabric. Using digital tools like vector graphics software can help you make neat and adjustable line drawings. Remember, a good embroidery pattern is the key to a fun and successful stitching experience.
Choosing the Right Fabric and Threads
The fabric and thread you choose will affect your embroidery results. When picking fabric, think about its weave and weight. Even-weave fabrics like linen or Aida cloth are great for beginners. They have a grid-like pattern, which makes stitching easier. But feel free to try other materials like cotton, silk, or felt.
Embroidery floss comes in many colors, giving you many choices. The number of stitches you use will change how much thread you need. When you start a project, it’s a good idea to buy a little more floss than you think you’ll use. This way, you won’t run out while stitching!
Pay attention to the fabric color and how it matches your chosen floss shades. Try out different thread weights and textures for added depth and dimension in your embroidery.
Setting Up Your Workspace
Creating a cozy and tidy workspace is very important for a good embroidery experience. Pick a place with good light where you can relax and pay attention to your stitching. Keep all your tools and materials close to you.
Before you start, make sure your fabric is tight in the embroidery hoop. First, loosen the screw on the outer hoop and take it off the inner hoop. Next, place your fabric over the inner hoop and center the design. Gently press the outer hoop down on the fabric and tighten the screw.
Make sure the fabric is tight, just like a drumhead. Having a good workspace and a properly fitted embroidery hoop will help make your stitching easier and more fun.
Step-by-Step Guide to Crafting Embroidery Patterns
Are you excited to jump into the fun world of making your own embroidery patterns? We will guide you through an easy and clear process. It will be enjoyable for both beginners and experienced stitchers. We will explain every step, from drawing your first idea to transferring the design and finally turning it into something beautiful with thread.
It doesn’t matter if you like playful freehand designs or detailed geometric ones. The basic rules are the same for everyone. So, take your sketching tools. Choose your favorite fabric and threads. Let’s start this creative adventure together!
Step 1: Finding Inspiration for Your Design
Inspiration for your embroidery designs can come from very simple things. You can look at the beauty of nature, check out interesting artwork, or draw random shapes and patterns. Your creativity has no limits! Feel free to try new ideas and don’t hold back in your thinking.
If you like a more organized way to start, there are many free hand embroidery patterns available online and in craft books. These patterns can help you begin your project. You can change and add your style to them too. The most important thing is to find what speaks to you and sparks your imagination.
Keep in mind, the best designs come from your own way of seeing things. Enjoy the fun and freedom of looking at different sources of inspiration. Before long, you’ll find your unique style in the exciting world of DIY embroidery.
Step 2: Sketching Your Pattern
Once you find your inspiration, it’s time to start sketching your pattern. You don’t need to be a great artist to make nice designs for embroidery. Begin with simple shapes and lines. Then, add details as you go.
If you like freehand drawing, let your creativity flow. Start by sketching lightly. You can erase and change things until you like the overall look. If you are using a reference image, trace it on paper to get the main outlines.
Keep in mind your embroidery stitches while you sketch. Make complex shapes simpler to stitch. When you’re happy with your sketch, you can improve it by creating a clean line drawing. Use a fine-tipped pen or a digital drawing tool to do this.
Step 3: Transferring Your Design to Fabric
Place your printed or hand-drawn embroidery pattern inside a tight embroidery hoop. Start with the inner hoop, making sure the flat side faces up. Put this hoop under your fabric. Next, lay the top hoop over the fabric and your design. Tighten the screw to hold everything in place. Make sure the fabric is tight to avoid any folds while transferring the design. Now, take your embroidery floss and use a backstitch or running stitch to trace the pattern on the fabric. For detailed parts like French knots or lettering, closely look at your original pattern.
Step 4: Beginning the Embroidery Process
With your pattern now on the fabric, it’s time for the fun part: stitching! First, thread your needle with a comfortable length of embroidery floss and tie a knot at the end. Start stitching along the lines you transferred.
Pick embroidery stitches that work well with your design and skill. If you are a beginner, try simple stitches like the back stitch, running stitch, and cross stitch.
As you become better, you can try more complex stitches. While stitching, make sure your tension is steady and your stitches are even. Feel free to play around and add your unique touch to the design. Enjoy this calming and rewarding process as you watch your project come to life, stitch by stitch.
Enhancing Your Embroidery Skills
As you get better with basic embroidery techniques, think about trying more complex stitches. Learning stitches like French knots, seed stitch, and satin stitch can greatly improve your work. They can also provide you with many creative possibilities.
Don’t hesitate to try different colors and textures. Mixing various shades of embroidery floss can give your pieces added depth. Keep practicing regularly and look for inspiration from places like online tutorials and embroidery books. With focus and attention to detail, you will keep improving your skills and make beautiful hand-embroidered works.
Tips for Improving Stitch Technique
Improving your stitch technique takes time and practice. Start by focusing on basic stitches like the running stitch, back stitch, and split stitch. Doing these stitches often will help build your muscle memory and make your stitches better.
Pay attention to your tension while stitching. Keeping the tension even helps your stitches look smooth and neat. This prevents the fabric from puckering or getting twisted.
When you feel ready, try more complex stitches like French knots. Don’t hesitate to undo and redo stitches until you are happy with how they look.
Experimenting with Colors and Textures
One of the best things about embroidery is the endless ways to play with colors and textures. Don’t just use one strand of embroidery floss. Try using multiple strands to make thicker lines or to add soft fades.
Using colors that contrast can help your designs stand out. On the other hand, colors that are similar can create a calm and nice look. The key is to try different mixes and see which ones fit your style.
You can also add different textures to your embroidery by using a variety of threads. Silk threads bring elegance and shine. Metallic threads add a fancy sparkle.
Conclusion
Embroidery is a fun mix of creativity and skill. When you learn DIY embroidery patterns, you open up a new world of personal art. Picking the right tools, fabric, and threads is important for your project. From drawing to sewing, every step adds to your art. Pay attention to how you stitch and play around with color to boost your work. Keep in mind that practice helps you get better. Dive into DIY embroidery with lots of energy and patience. Let your ideas flow into each design. Happy stitching!
Frequently Asked Questions
What is the Best Fabric for DIY Embroidery?
The best fabric for DIY embroidery will depend on your project and how skilled you are. If you are a beginner, linen and Aida cloth are good choices. You can also use cotton or old clothes. When picking a fabric, think about its weave, weight, and width, whether it’s in inches or centimeters.
How Can I Transfer My Design to the Fabric?
You can move your design in different ways. You might use tracing, transfer paper, or iron-on transfer pens. Tracing means you put your design under your fabric. Then, you can use a light to see it so you can trace it. If you have artwork ready for the printer, you can use iron-on transfer paper to put the ink straight onto the fabric.
Can I Use Any Thread for Embroidery?
You can try different threads for your project. However, many people like to use embroidery floss. It is known for its texture, color choices, and quality. Pick a thread type that suits your fabric and design.
How Do I Choose the Right Needle?
The correct needle you need will depend on the type of fabric, thread, and stitch you are using. Choose a needle with a big enough hole so you can easily thread your embroidery floss. If you are sewing with thicker fabrics, pick a needle that is sharper and stronger.
What Are Some Common Mistakes to Avoid?
Common mistakes are uneven tension, different stitch lengths, and loose knots. Make sure your fabric is tight in the embroidery hoop. Keep the tension even while stitching. Knot your threads well to stop them from coming undone. Practice basic stitches like the running stitch and backstitch. This will help you build a strong skill set.
diy embroidery designs
diy embroidery designs